• Home
Home
Anti-DDoS CDNStatic & dynamic acceleration, edge scrubbingAnti-DDoS IP forwardingL4 forwarding with protected IPsSDK game shieldClient SDK for gaming workloadsAnti-DDoS serversDedicated compute with high availabilityLearn more
Gaming solutionLow latency + protectionFinancial solutionCompliance & scrubbingLive streaming solutionPush/pull at the edgeBlockchain solutionWeb3 infra protectionExplore
DocumentationAPIs & onboardingHelp centerFAQs & ticketsBlog & newsUpdates & best practicesGlobal speed testMulti-region performance checksTag cloudTopic map across the siteOpen docs
AboutMission & visionCareersHiringPartnersEcosystemContactSales & supportContact us

Documentation

  • Introduction
Docs/Getting Started/Quick Start Guide

Quick Start Guide

速盾网络 Team
Docs

On this page

No outline

Share

𝕏fin

Enterprise CDN & acceleration with AI-driven monitoring and full-spectrum, real-time DDoS/CC protection. Trusted by tens of thousands of companies for fast, secure, and reliable content delivery and DDoS mitigation.

Product

  • Anti-DDoS CDN
  • Anti-DDoS IP forwarding
  • SDK game shield
  • Anti-DDoS servers

Solutions

  • Gaming solution
  • Financial solution
  • Live streaming solution
  • Blockchain solution

Resources

  • Documentation
  • Help center
  • Blog & news
  • Global speed test

Company

  • About
  • Careers
  • Partners
  • Contact

© 2026-2028 sudun.com 保留所有权利

  • Privacy
  • Terms
  • Cookies

Quick Start Guide

Welcome to Sudun CDN. This guide will walk you through the basic setup of Global Content Acceleration in less than 10 minutes.

Preparation

Before you begin, make sure you have:

- An active Sudun account

- Administrative permissions for the domain's DNS settings

- Basic understanding of DNS records (CNAME, A records).

- Origin server information (IP address or domain name)

Step 1: Create your first distribution configuration

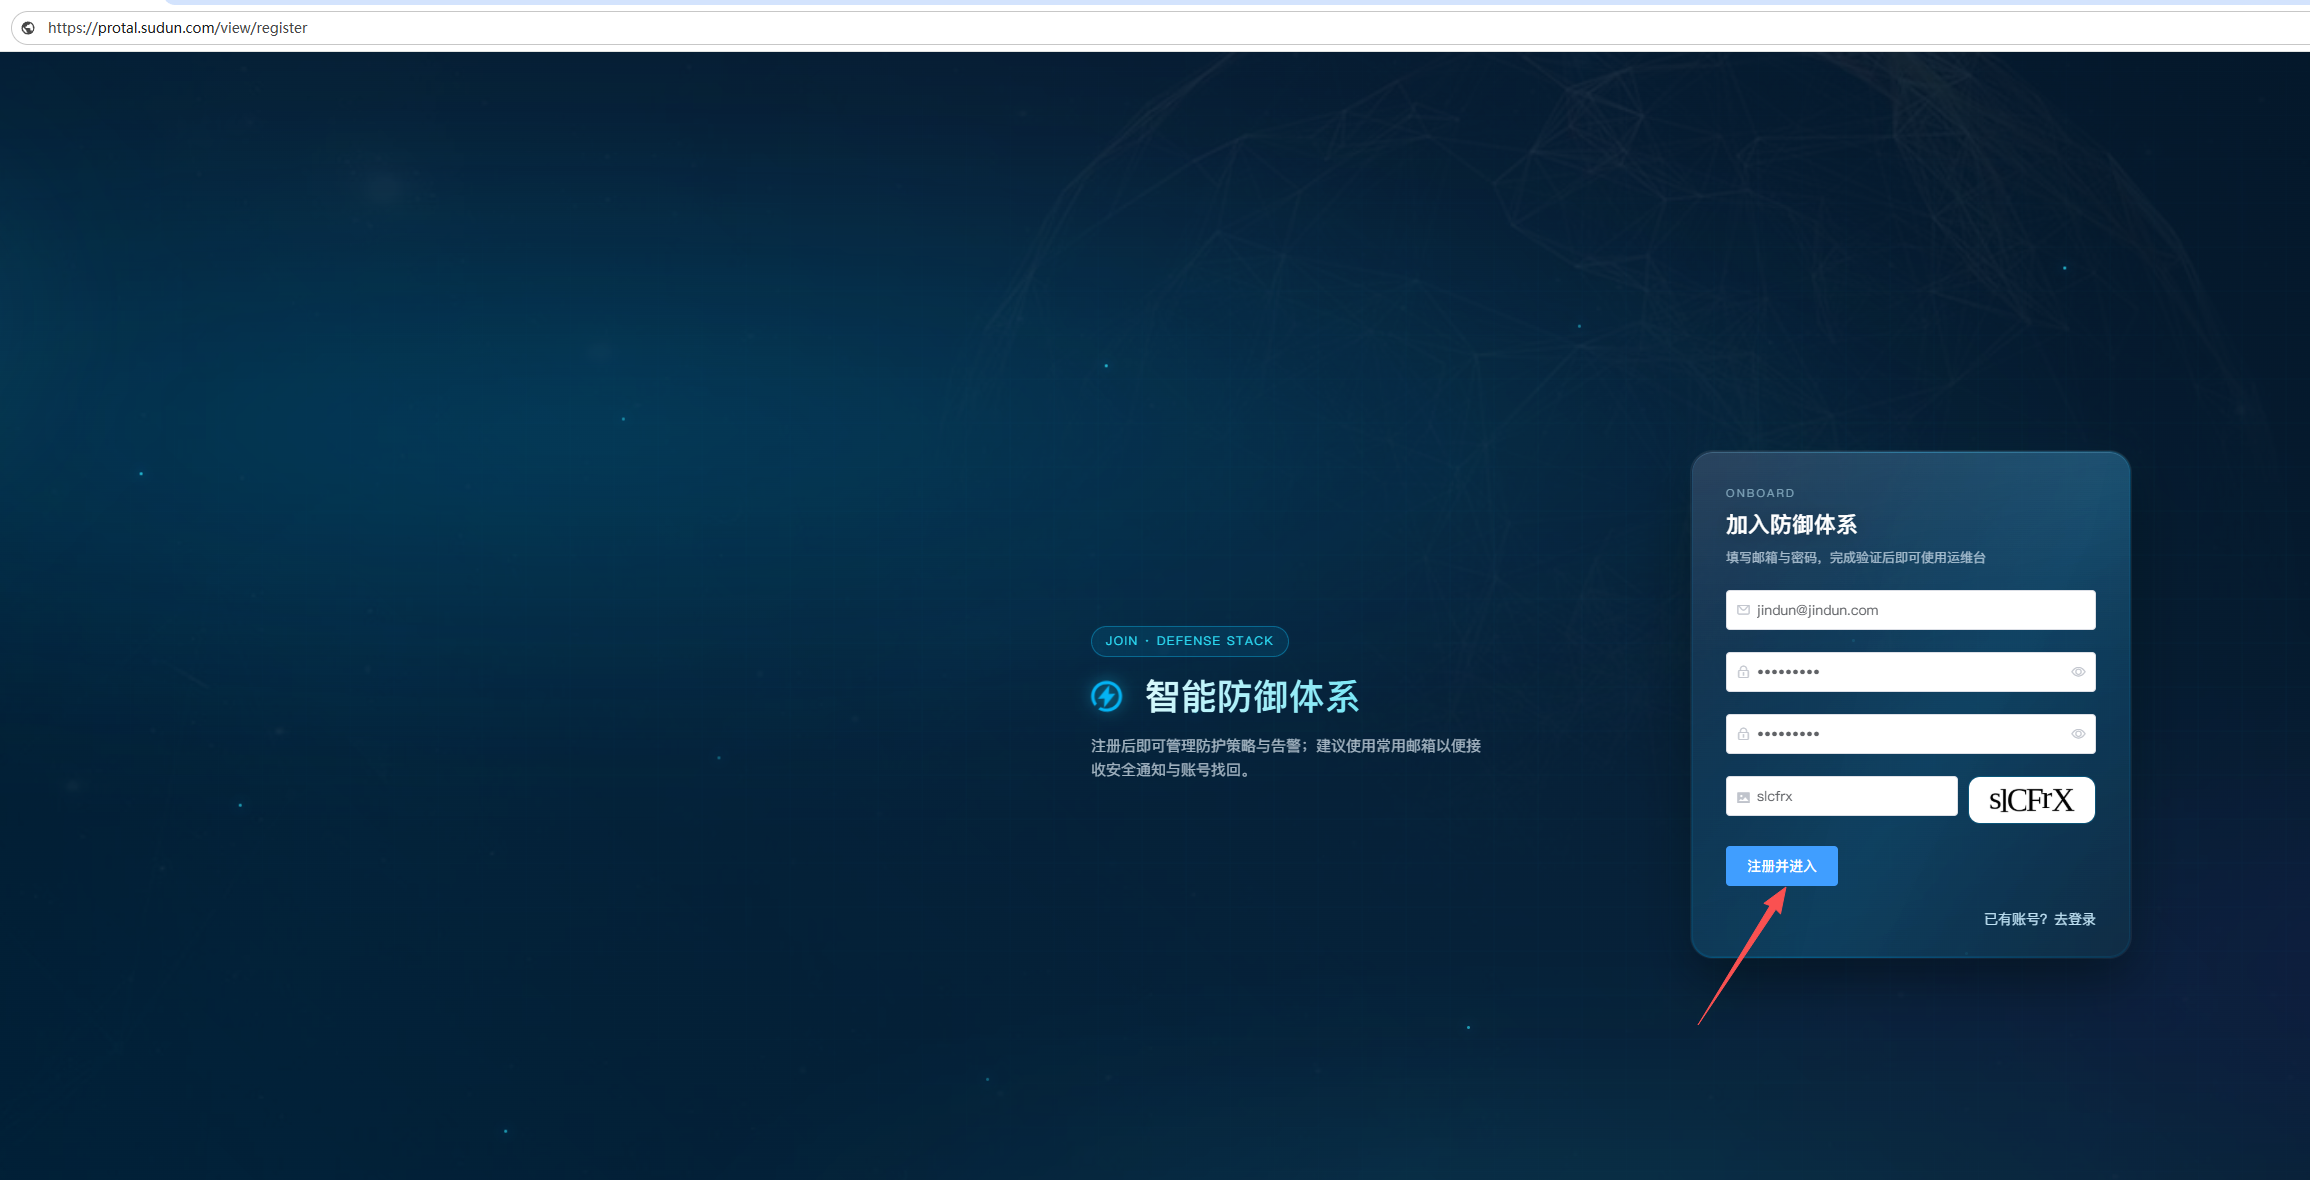
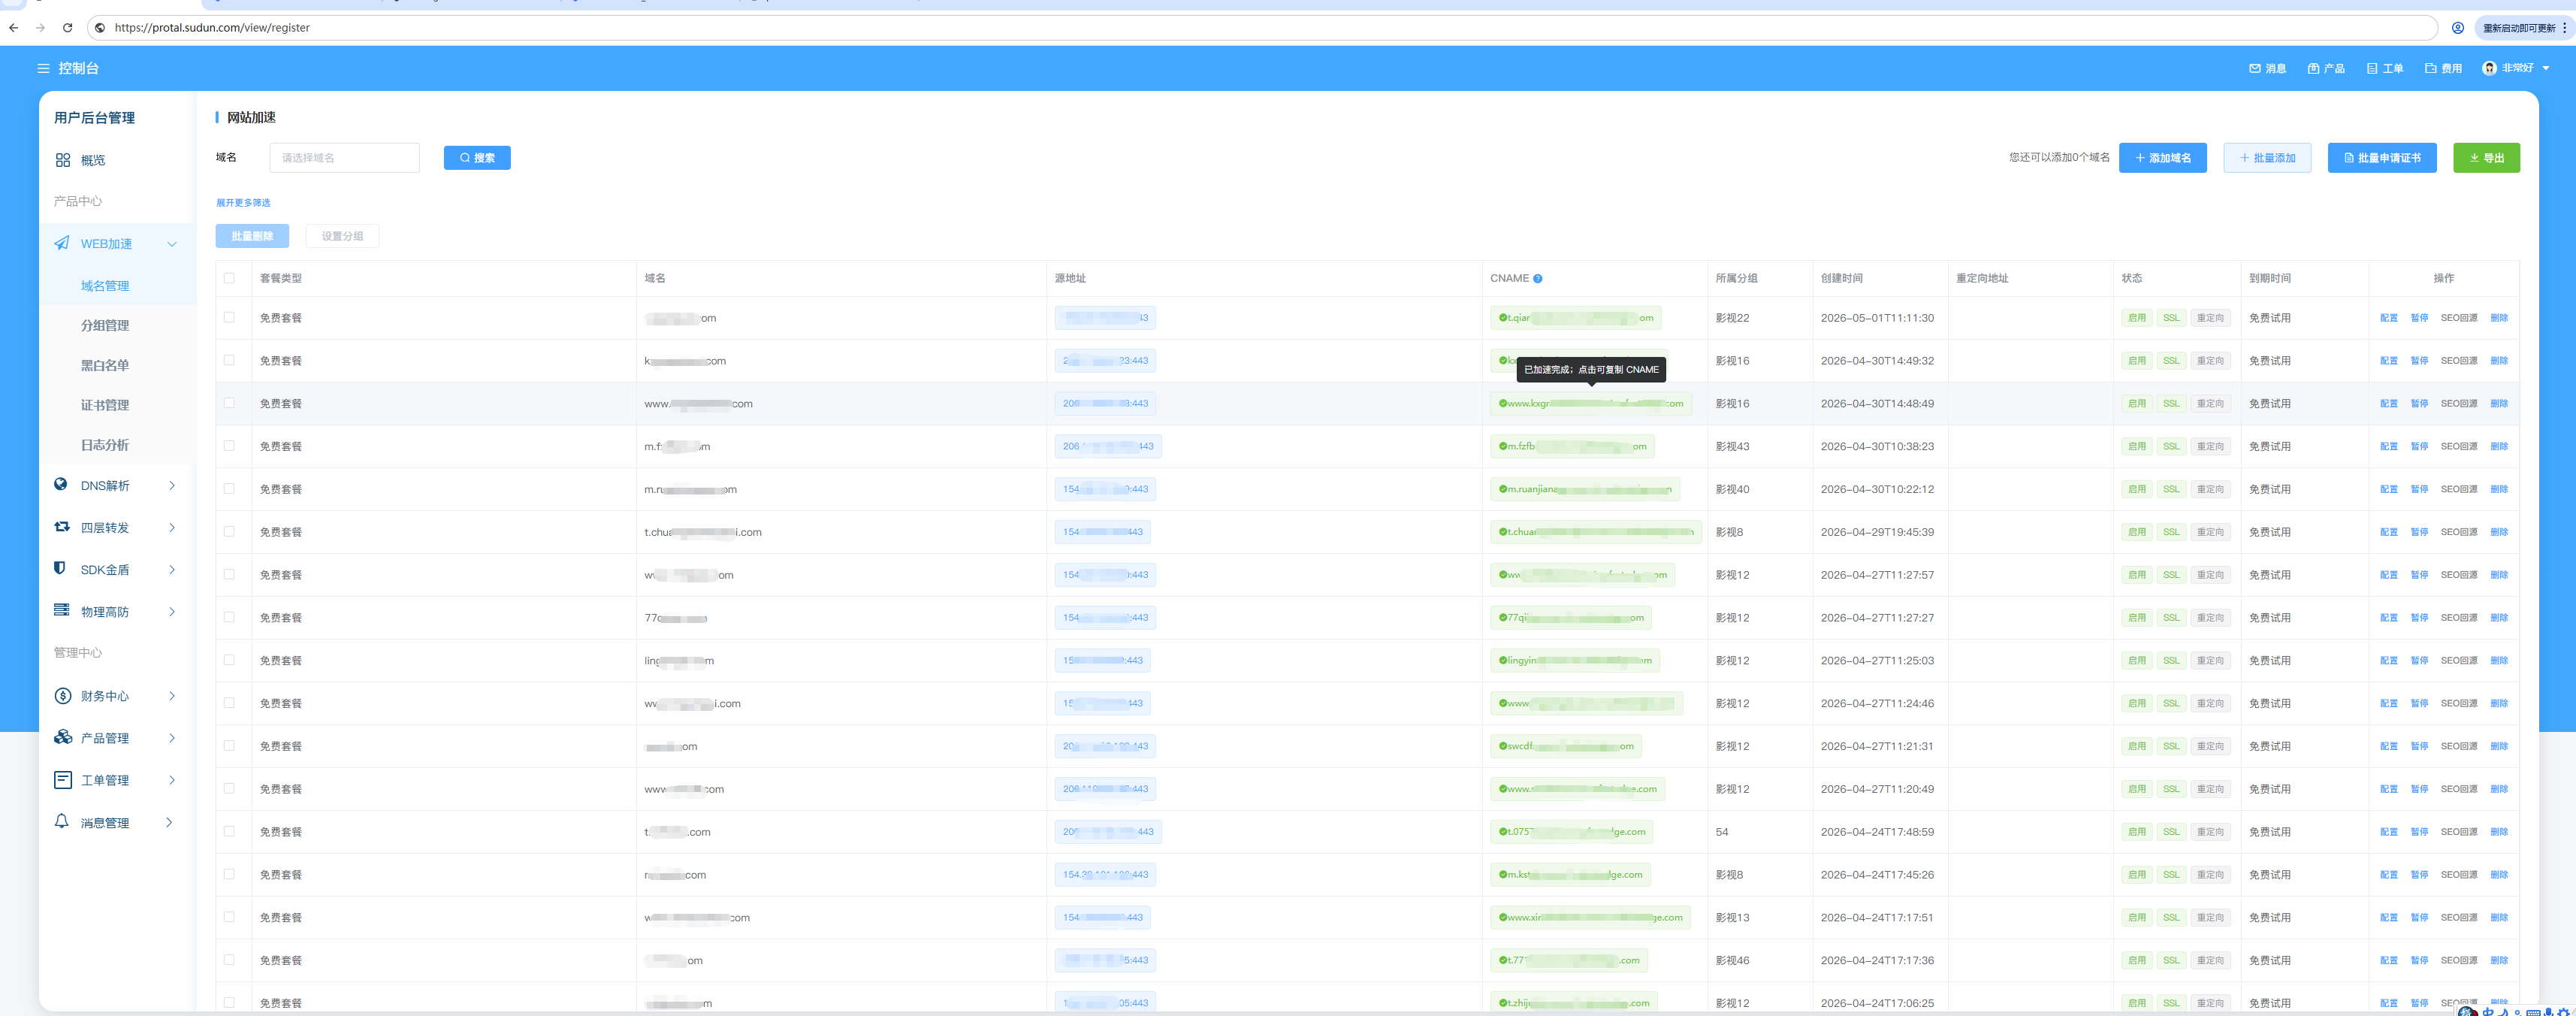
1. Register the Sudun console: https://protal.sudun.com/view/register

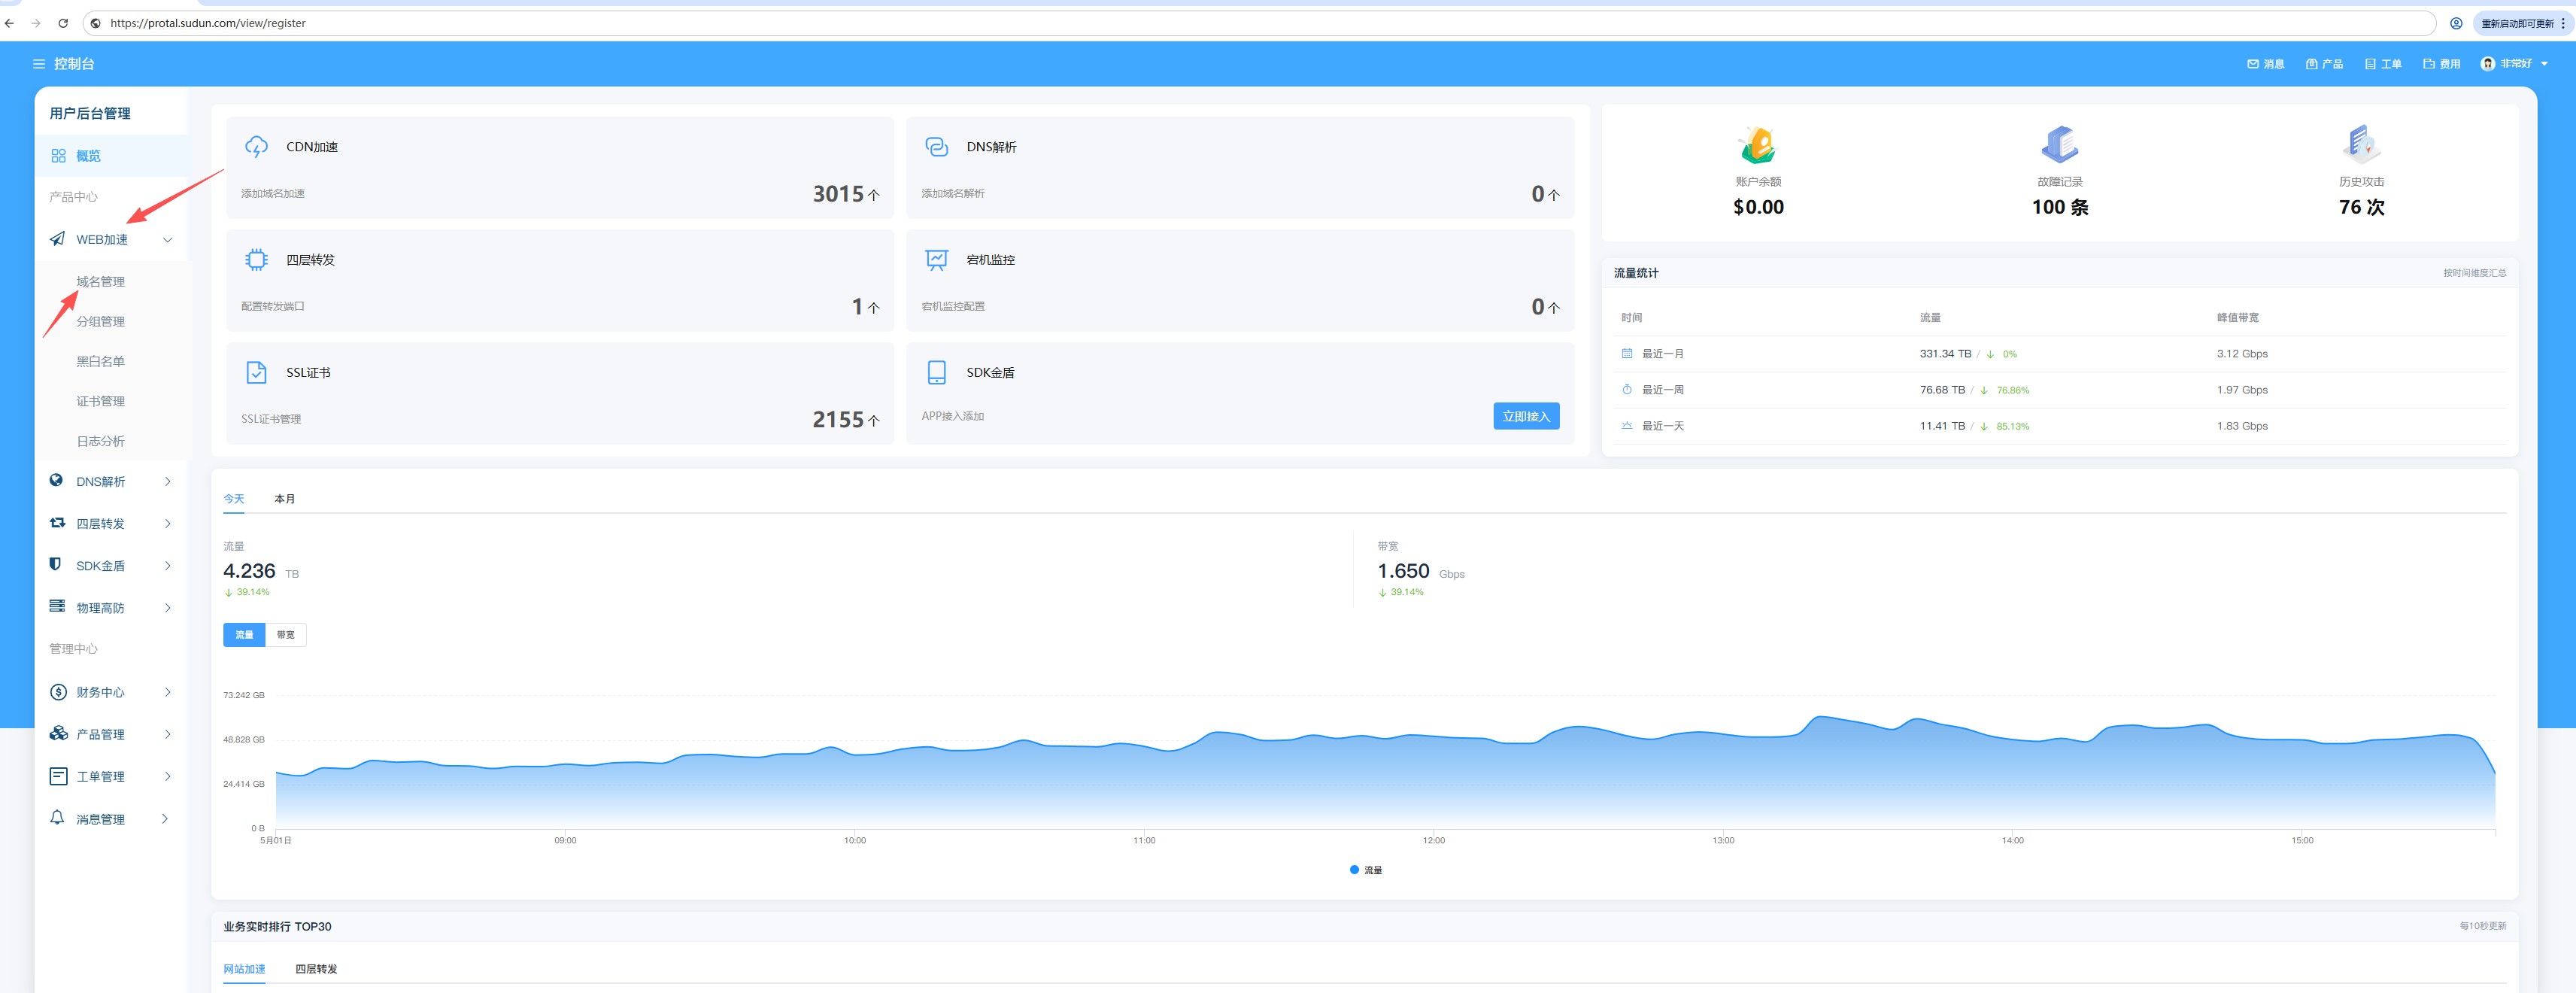
2. Go to **WEB Acceleration** > **Domain Management** >**Add Domain**

3. Create domain name grouping: You can customize the grouping settings to facilitate domain name management

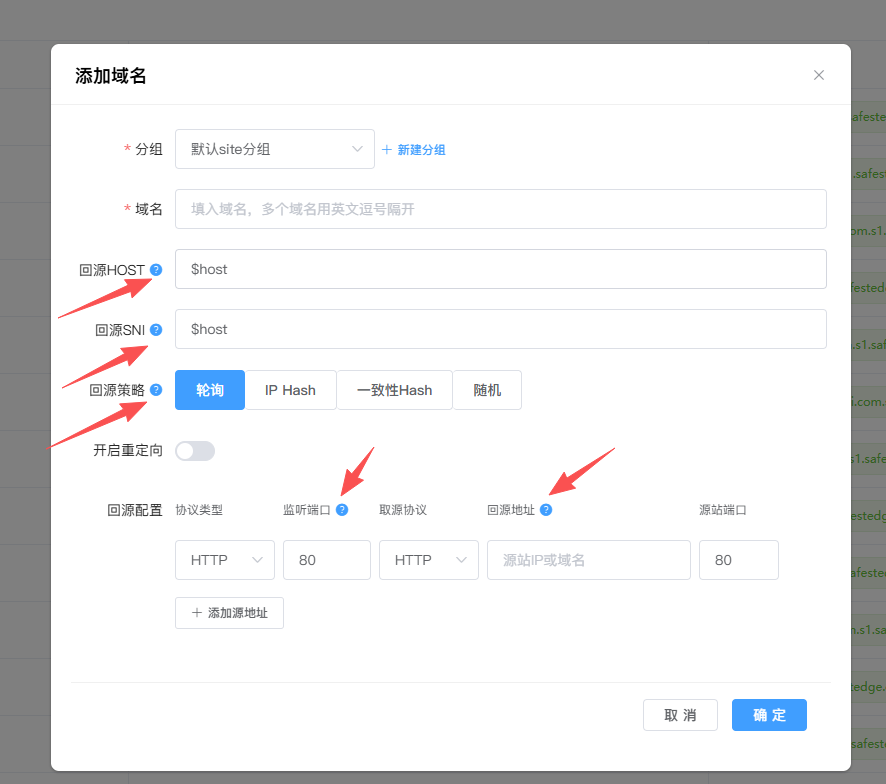
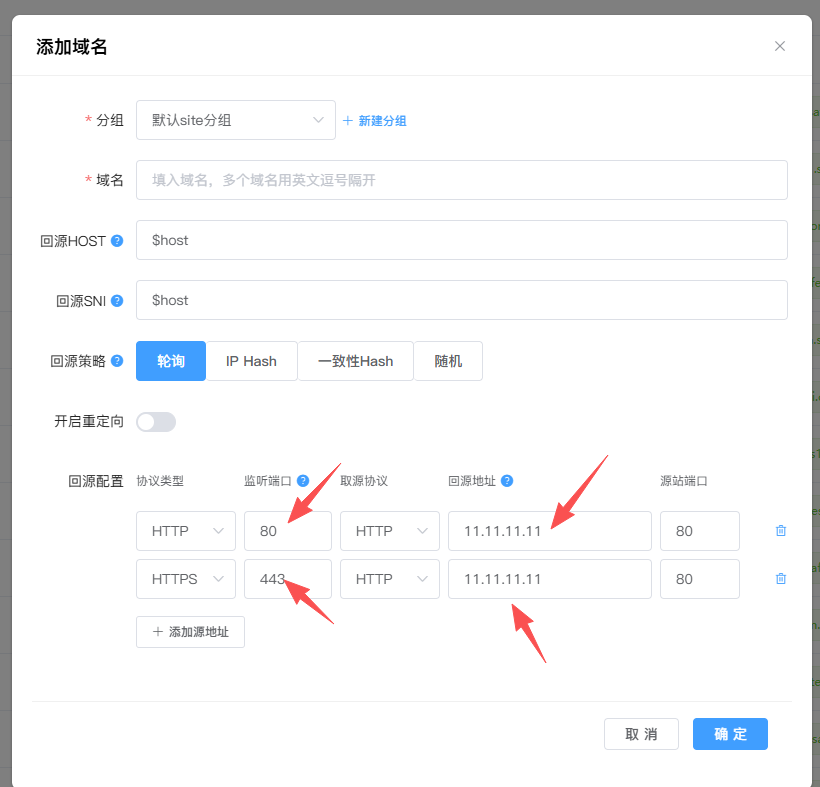
## Step 2: Configure the origin server settings

1. In the CDN distribution configuration, configure the origin server address and back-to-origin protocol of the listening port

2. It is recommended to use HTTPS back to the origin server for enhanced security

3. Read the FAQ in the list of domain names you added

Step 3: Update DNS records

1. Once added, a CNAME record will be automatically generated:

2. Log in to your domain registrar admin panel

  1. To add a CNAME record:
  • Host Name:你在SuDun所添加的主机值,如WWW或@

  • Destination address: , TTL: 600填写生成的CNAME记录

Wait for the DNS to take effect (usually 5-30 minutes).

Step 4: Verify the configuration

1. Observe the color change of the CNAME generated by the SuDun system

2. If prompted: Accelerated complete, the configuration is complete.

3. If the acceleration fails, it is not resolved to CNAME, which means it is not resolved

Step 5: Relevant screenshot guidelines

第一步,注册点击域名管理域名添加仔细阅读相关FAQ填写好回源IP和端口解析完成后加速成功